Introduction
The world of filmmaking has evolved dramatically with the advent of handheld camera stabilizer. These devices empower filmmakers to shoot smooth, cinematic footage that once required bulky and expensive equipment. By mitigating unwanted movement and vibrations, handheld stabilizers ensure that the resulting video is steady and professional.
Handheld camera stabilizers come in various shapes and sizes, each designed to meet the specific needs of filmmakers. Whether you’re shooting a fast-paced action scene or documenting a quiet, intimate moment, they provide the support necessary to achieve clean and stable shots.
In this guide, we’ll dive deep into the essential aspects of handheld camera stabilizers. We’ll explore how they work and categorize different types to help you find the perfect match for your filming projects. Additionally, we will highlight the key features to consider when choosing a stabilizer. By understanding these fundamentals, you’ll be better equipped to select and use a handheld camera stabilizer that elevates your work to the next level.
In the journey of exploring the wonders of handheld stabilizers, it’s also crucial to learn proper balancing techniques and maintenance practices. This will ensure your equipment remains reliable for each cinematic endeavor. Embrace the innovation of stabilizers and unlock the potential to transform your video production quality.
The Technology Behind Camera Stabilization
Understanding the technology behind camera stabilization is key for filmmakers. At its core, the idea is simple. Camera stabilizers lessen unwanted movements. These movements can ruin a shot. How do they do this? They use a combination of mechanics and electronics.
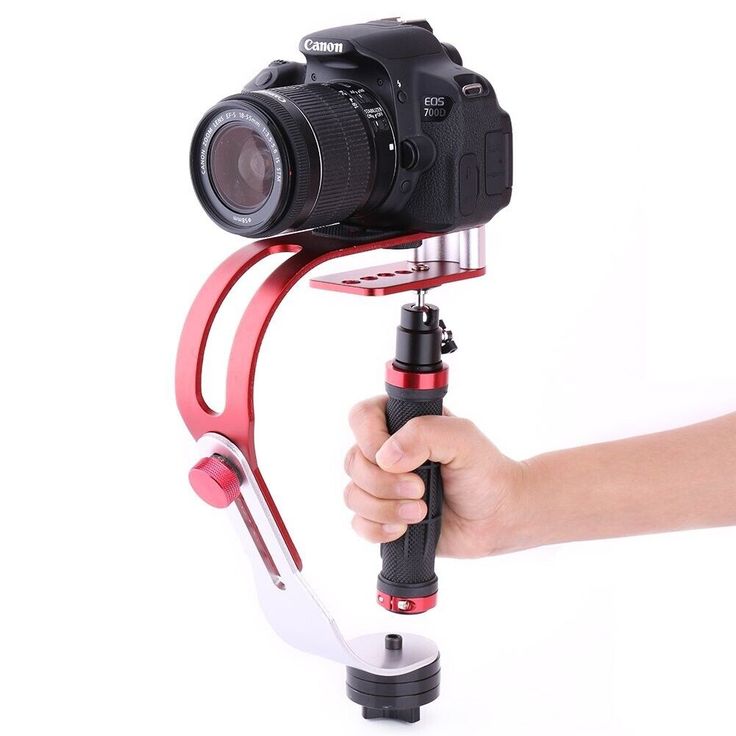
Handheld camera stabilizers have three main parts. These are the handle, the gimbal, and the weights. The handle allows the operator to hold and move the device. The gimbal is a pivot point. It lets the camera tilt and pan smoothly. Weights balance the camera. They counteract unwanted motion.
Many stabilizers also have motors. These are part of what we call a ‘3-axis gimbal’. Motors make tiny adjustments in real time. Thus, they keep the camera level and steady.
Some high-tech stabilizers use sensors and algorithms. Sensors detect movement. Algorithms decide how to correct it. When the stabilizer senses movement, the motors adjust. This stops the jerky motion.
Filmmakers should know these technologies. They help in choosing the right handheld camera stabilizer. Look for a balance between manual and automated systems. This will depend on your needs and the kind of filming you do.
Types of Handheld Stabilizers for Filmmakers
When looking at handheld camera stabilizers, it’s important to know the different types available. Each type serves a unique purpose and suits different filming styles. Here are the main types of stabilizers filmmakers can choose from:
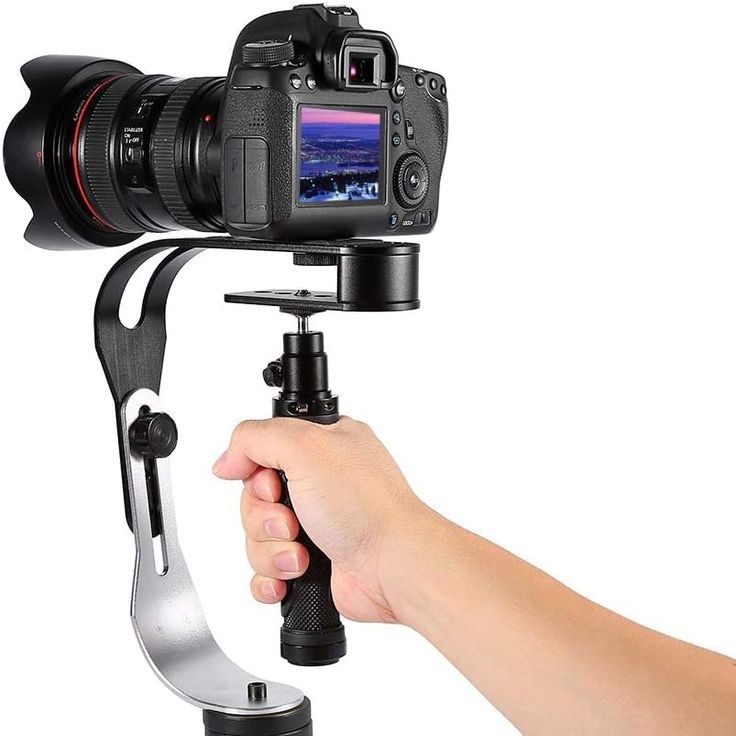
- 2-Axis Stabilizers: These stabilizers manage up and down, and side to side motions. They are simple and usually budget-friendly. Perfect for new filmmakers.
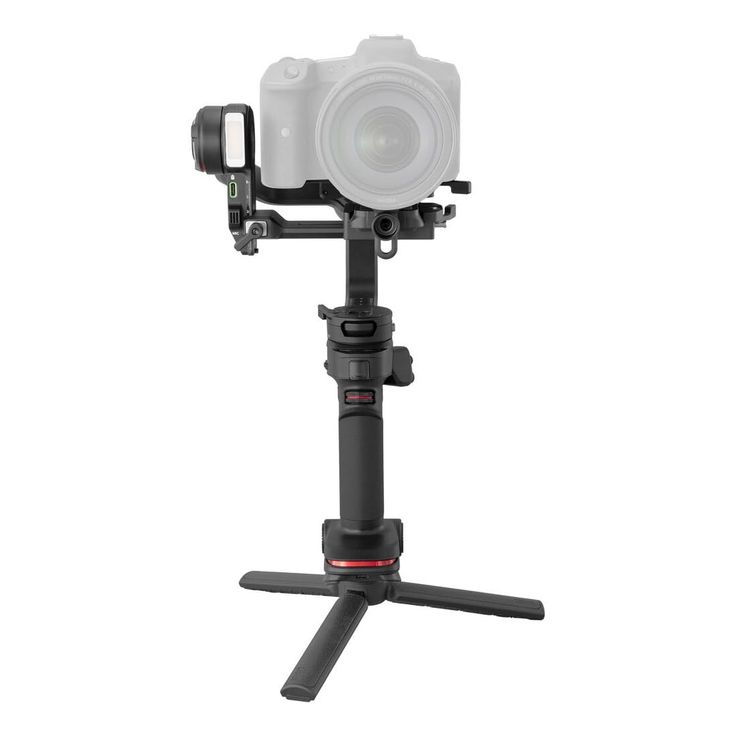
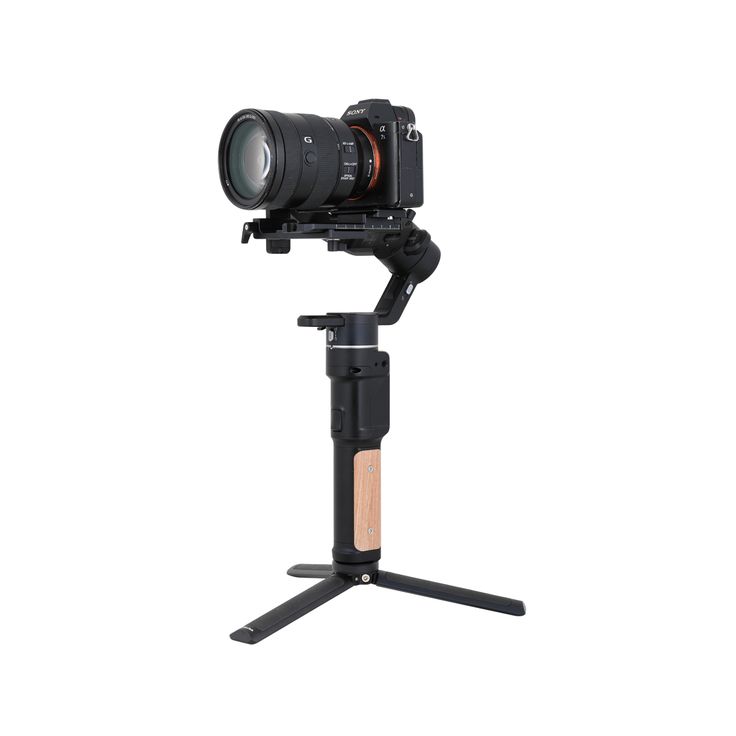
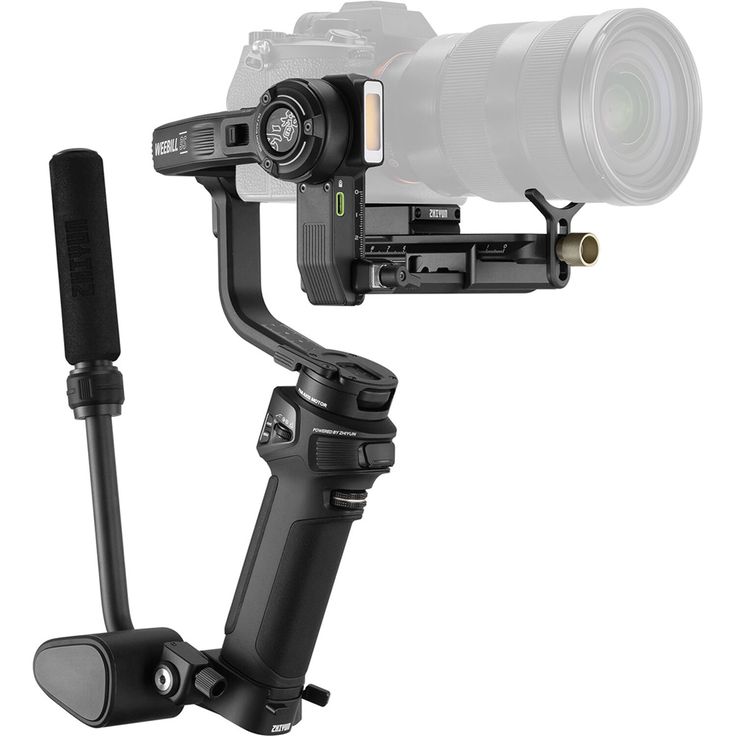
- 3-Axis Gimbals: They adjust for tilt, pan, and roll motions. These stabilizers are more advanced than 2-axis stabilizers. They use motors and make real-time adjustments for smoother footage.
- Vest and Arm Stabilizers: These have a harness that takes weight off your arms. Good for heavy setups and long shooting times. They offer great stability but are bulkier.
- Electronic Stabilizers: These are essentially 3-axis gimbals with extra features. They use batteries and have modes for different scenarios. They come with various tech perks like Bluetooth control.
- Mechanical Stabilizers: These do not need batteries. You balance them manually with weights. They are reliable and have no electronic parts that could fail.
- Handheld Rig Stabilizers: These combine a rig setup with stabilization features. Handy for adding accessories, like monitors and microphones.
Each type of handheld camera stabilizer has its pros and cons. The choice depends on your filming needs, the camera weight, and your budget. Think about these factors when selecting your stabilizer to ensure a good match for your projects.
Key Features to Look for in a Stabilizer
When choosing a handheld camera stabilizer, several key features stand out:
- Weight Capacity: Check the maximum weight the stabilizer can handle. Ensure it supports your camera and any attached gear.
- Build Quality: A stabilizer built with high-quality materials will last longer. It should feel sturdy in your hands.
- Ease of Use: A good stabilizer should be user-friendly. Look for one that is easy to set up and operate.
- Battery Life: For electronic stabilizers, check the battery life. You want it to last through your shoots without constant recharging.
- Versatility: Some stabilizers work with different cameras and accessories. This versatility can be very handy.
- Stabilization Performance: How well does it smooth out movements? Test the stabilizer to see how it performs in action.
- Portability: Consider how easy it is to carry. A compact and lightweight design can make a big difference.
- Additional Features: Look for extras like Bluetooth connectivity or a companion app. These can enhance your filming experience.
Remember these features when shopping for a handheld camera stabilizer. They will guide you to the right choice for your filming needs. A stabilizer that matches these criteria can greatly improve your video quality.
Popular Handheld Camera Stabilizers on the Market
The market offers a range of popular handheld camera stabilizers. These options meet the diverse needs of filmmakers. Here’s a breakdown of some favorites:
- The DJI Ronin-S: This is a top pick for professionals. It provides strong stabilization and is user-friendly.
- Zhiyun Crane Series: These stabilizers are known for their compact size and reliability. They suit various shooting environments.
- MOZA AirCross: It stands out for its lightweight design. It makes carrying and operating the device easier.
- Glidecam HD-Pro: This is a go-to for mechanical stabilization fans. It gives great control without batteries.
- FeiyuTech Gimbals: FeiyuTech offers a range of models. They balance quality and affordability well.
- Steadicam Solo: It converts between a handheld stabilizer and monopod. This offers flexibility in shooting styles.
When choosing a handheld camera stabilizer, think about your camera setup. Consider also your specific shooting needs. Look for features that support a range of movements and shooting scenarios. Test different stabilizers to find the one that feels right and meets the guidelines discussed earlier in this guide.
How to Use a Stabilizer for Optimal Results
Grip the Handle Properly
Holding the stabilizer handle correctly ensures stability and minimizes unwanted shakes. Grip it firmly but avoid clenching too tightly, as this can transfer tension to your wrist and affect smoothness. Keep movements gentle and deliberate to maintain control. For instance, focus on relaxing your fingers while maintaining a secure hold. This balance prevents fatigue during long shoots and enhances footage quality.
Master Smooth Movements
Achieving smooth pans and tilts requires practice and proper technique. Instead of moving your entire arm, use subtle wrist motions to adjust angles. This precision reduces jerky movements and creates fluid transitions between shots. Transitioning smoothly from one angle to another demonstrates mastery over the stabilizer’s capabilities. Regular practice refines these skills, ensuring professional-grade results consistently.
Ensure Proper Camera Balance
Balancing your camera on the stabilizer is essential for avoiding shaky footage or unnecessary strain on motors. Misaligned setups lead to uneven weight distribution, compromising performance. Spend time adjusting counterweights and positioning the camera centrally before filming. Rebalancing after changing lenses or accessories ensures consistent functionality throughout shoots.
Walk with Careful Technique
Walking while using a handheld camera stabilizer demands attention to detail. Move slowly and adopt a heel-to-toe motion to minimize vertical shakes caused by uneven steps. Practice walking in straight lines first, then progress to more complex movements like turning corners or navigating obstacles. Thoughtful pacing enhances overall smoothness and professionalism in your videos.
Adjust Settings Based on Situations
Electronic stabilizers often include adjustable settings tailored to specific scenarios. For fast-moving scenes, increase responsiveness to match quick actions without blurring. Conversely, slower shots benefit from smoother damping settings that eliminate minor vibrations entirely. Customizing these parameters according to the environment ensures optimal performance every time. Always review default settings and tweak them based on your preferences or shooting conditions.
Practice Different Scenarios
Regular practice builds confidence and competence when using a stabilizer. Experiment with various scenarios—indoor versus outdoor, close-up versus wide-angle shots—to understand its limits and strengths fully. Start with simple tasks like steady walking shots, then advance to dynamic sequences involving running or climbing stairs. Consistent practice prepares you for unexpected challenges during actual shoots, improving adaptability and creativity.
Monitor Weather and External Factors
External factors such as wind or uneven terrain impact stabilizer effectiveness. In windy conditions, consider adding drag tools or weights to counteract gusts. On rough surfaces, slow down further and refine your heel-to-toe technique. Adapting to environmental changes ensures consistent results regardless of location. Planning ahead minimizes disruptions caused by unforeseen circumstances.
Combine Techniques for Best Outcomes
Combining multiple techniques maximizes stabilizer efficiency. For example, pair gentle grip with careful walking motions for ultra-smooth tracking shots. Similarly, fine-tune electronic settings while practicing movement patterns to achieve seamless integration of hardware and human input. Transitioning between techniques naturally improves versatility and enhances final footage significantly.
Invest Time in Learning Advanced Features
Modern stabilizers offer advanced features like follow modes, horizon leveling, or custom profiles. Spend time learning these functions to unlock their full potential. Watch tutorials, read manuals, or experiment independently to discover what works best for your style. Advanced knowledge empowers smarter decisions during challenging shoots, elevating your filmmaking abilities.
Stay Patient and Persistent
Producing high-quality, stable footage takes patience and persistence. Even seasoned professionals encounter issues occasionally, so don’t get discouraged by initial difficulties. Focus on incremental improvements through regular practice and thoughtful adjustments. Over time, your efforts translate into smoother, more polished videos that showcase both technical skill and creative vision.
By following these detailed tips and dedicating yourself to regular practice, you’ll soon master the art of producing smooth, stable, and professional-looking footage with your handheld camera stabilizer. Each step contributes to refining your technique, ensuring success across diverse filming situations.
Balancing Techniques for Smooth Footage
Understanding the Center of Gravity
Proper balancing starts with identifying the center of gravity. Position your camera so that it sits centered over the stabilizer. This ensures stability and minimizes unwanted tilts or wobbles during filming. Misalignment can lead to uneven footage, making this step crucial for achieving smooth results.
Adjusting the Counterweights Effectively
Most handheld camera stabilizers come equipped with adjustable counterweights. These weights must align perfectly to balance the camera’s weight evenly across all axes. Spend time fine-tuning their placement until the stabilizer feels stable in your hands. A well-balanced system reduces strain on motors and enhances overall performance.
Testing and Rebalancing Regularly
After initial adjustments, perform a test run to check for smoothness. Walk slowly while recording, observing how the camera reacts to movements. If you notice vibrations or instability, rebalance the setup by readjusting the camera or counterweights. Continuous testing ensures optimal performance before final shoots.
Using a Stand for Precision Adjustments
Setting up your stabilizer on a stand allows for hands-free adjustments. This method gives you more control over minor tweaks without worrying about holding the device steady. Use the stand to ensure everything is aligned correctly, reducing human error and improving accuracy.
Checking Gimbal Tension and Movement
The gimbal’s tension plays a vital role in smooth footage. Ensure it moves freely but remains tight enough for controlled adjustments. Too loose, and the camera may drift uncontrollably; too tight, and the stabilizer loses its ability to absorb vibrations effectively. Striking the right balance improves responsiveness and stability.
Practicing the Drop Time Technique
The drop time technique involves releasing the stabilizer from a tilted position to see how quickly it returns upright. Ideally, the process should take 2–3 seconds. If it happens faster or slower, adjust the weights or gimbal settings accordingly. Mastering this technique helps identify potential imbalances early, ensuring smoother shots later.
Fine-Tuning as Equipment Changes
Small changes in gear—such as switching lenses or batteries—can affect the stabilizer’s balance. Fine-tune regularly, especially when transitioning between locations or equipment setups. Consistent adjustments maintain peak performance and adaptability under varying conditions.
Practicing Movements for Optimal Results
Beyond technical adjustments, practice different movement techniques to maximize smoothness. Learn how to pivot smoothly, walk at consistent speeds, and transition between shots effortlessly. Combining physical practice with precise balancing leads to professional-grade footage even in challenging environments.
Monitoring Weather Conditions for Outdoor Shooting
Weather impacts stabilizer performance outdoors. Wind or temperature fluctuations might require recalibrating the balance periodically. For example, cold weather can stiffen gimbals, while wind affects camera stability. Preparing for these factors ensures smoother footage regardless of external conditions.
Staying Patient and Persistent
Achieving perfect balance takes practice and patience. Even experienced users occasionally need to reevaluate their setups. Keep experimenting with adjustments and techniques until you achieve consistently smooth results. Over time, these efforts will significantly improve your video quality and confidence in using the stabilizer.
By following these balancing techniques, you can master the art of smooth footage creation with a handheld camera stabilizer. Each tip addresses specific challenges, ensuring your videos reflect professionalism and creativity. Remember, practice and persistence are key to unlocking the full potential of your stabilizer.
Maintenance and Care for Your Stabilizer
Proper maintenance and care of your handheld camera stabilizer are vital for long-lasting performance. Follow these simple steps to keep your stabilizer in top condition:
- Regular Cleaning: Gently wipe your stabilizer with a clean cloth after use. Remove dust and dirt that can hinder the gimbal’s movement.
- Check for Loose Parts: Inspect screws and knobs regularly. Tighten anything that has become loose to prevent wobbling or instability during use.
- Battery Maintenance: For electronic stabilizers, ensure batteries are charged and stored properly. Avoid leaving them in extreme temperatures as it can reduce battery life.
- Storage: Store your stabilizer in a dry, cool place. If it comes with a case, use it to protect against bumps and scratches.
- Avoid Water and Sand: Water can corrode and sand can jam the moving parts. Keep them away from beaches or wet conditions without proper protection.
- Update Software: For models with firmware, check for updates. New software can improve performance and fix bugs.
- Lubricate Moving Parts: Apply a small amount of lubricant to the gimbal if needed. Check your user manual for specific recommendations.
These steps will help maintain optimal functionality and longevity for your handheld camera stabilizer. Take care of your equipment and it will support your filmmaking for many projects to come.