Trim screws are small but mighty. They play a crucial role in carpentry and woodworking projects, adding a polished and professional look while providing a strong hold. Whether you’re tackling crown molding or installing baseboards, choosing the right trim screw can make all the difference.
This comprehensive guide will equip you with everything you need to know about trim screws, from understanding their different types and sizes to installation tips and best practices.
Types of Trim Screws
Trim screws come in a variety of styles and sizes to suit various applications. Here’s a breakdown of some common types:
Flat Head:
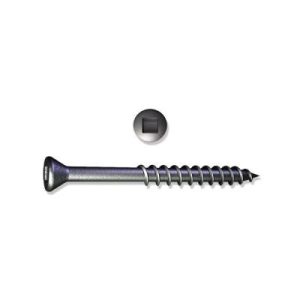
These screws have a flat head that sits flush with the material surface, creating a nearly invisible finish. Ideal for baseboards, crown molding, and other trim applications where a seamless look is desired.
Oval Head:
These screws feature an oval-shaped head that sits slightly above the material surface. They offer a balance between aesthetics and ease of driving, often used in applications where a slight indentation around the screw head is acceptable.
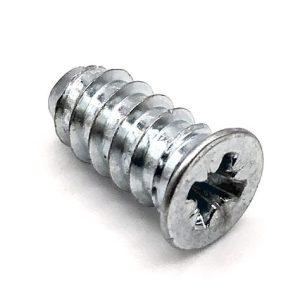
Round Head:
These screws have a rounded head that sits prominently above the surface. While not the most discreet option for trim work, they provide a strong hold and are easier to drive in at an angle.
Choosing the Right Material
Trim screws are typically made from two main materials:
-
Steel: The most common option, steel screws offer good durability and affordability. For exterior applications, look for galvanized or stainless steel screws that resist rust and corrosion.
-
Brass: Brass screws provide a decorative touch and are ideal for use with lighter-colored woods where they can blend in more seamlessly. However, they may not be as strong as steel screws.
Selecting the Right Size Trim Screw
Trim screw sizes are denoted by two numbers, such as #6 x 1 inch. Here’s what each number indicates:
-
Screw Gauge (diameter): The first number represents the screw’s gauge, or thickness. Lower gauge numbers indicate thicker screws. For trim work, #6 or #8 screws are commonly used.
-
Screw Length: The second number represents the screw’s length. It’s important to choose a screw length that’s long enough to penetrate both the trim piece and securely fasten it to the underlying surface, but not so long that it protrudes through the backside.
Drilling Pilot Holes
Drilling pilot holes before driving screws helps prevent splitting, especially when working with hardwoods. Here’s when using pilot holes is recommended:
-
Hardwood: Hardwood is more prone to splitting, so using a pilot hole slightly smaller than the screw diameter is advisable.
-
Long Screws: For longer screws, pilot holes help ensure a straight path and prevent the screw from wandering off course.
-
Thin Materials: Pilot holes can help prevent the screw head from pulling through thin materials like veneer.
Driving Trim Screws
Once you’ve and drilled pilot holes (if needed), it’s time for installation. Here are some tips for driving trim screws:
-
Use the Right Driver: Ensure you’re using a screwdriver bit that matches the screw head type (flat, oval, or Phillips).
-
Straight Driving: Drive the screw straight to avoid damaging the screw head or the material.
-
Countersink (Optional): For a completely concealed finish, use a countersink bit to create a small indentation around the screw head before driving it flush with the surface. This can be done after drilling the pilot hole (if used).
-
Don’t Overtighten: Avoid overtightening the screw, as this can strip the screw head or damage the material.
Filling and Touch-Ups
For a flawless finish, you can fill any slight gaps or imperfections around the screw head. Here are some options:
-
Wood Putty: Fill small gaps with wood putty that matches the wood stain or paint color. Apply, smooth, and let it dry before sanding and repainting.
-
Caulk: For gaps along seams or joints, apply a small amount of caulk that matches the trim color. Tool it smooth with a damp finger and remove any excess.
The Perfect Finishing Touch
Trim screws may be small, but they play a big role in achieving a professional-looking finish in your carpentry projects. By understanding the different types, sizes, and installation techniques, you can confidently select and use trim screws to add that perfect finishing touch!
Beyond the Basics: Choosing Trim Screws for Specific Applications
While the core types of trim screws covered previously will handle most projects, there are some specialty screws designed for specific applications:
-
Fine Thread Screws: These screws have finer threads compared to standard trim screws. They provide a tighter grip and are ideal for delicate materials or applications where minimal screw head visibility is desired.
-
Pocket Hole Screws: These screws feature a self-tapping design and a flat head that sits below the wood surface. They are typically used with pocket hole joinery, a woodworking technique that creates strong and concealed joints.
-
Drywall Screws: These screws have coarse threads and a larger head for driving into drywall without the need for pre-drilled holes. While not ideal for trim applications due to their larger size and visibility, they can be useful for attaching trim directly to drywall in some situations.
When choosing trim screws, consider the environmental impact. Opt for screws made from recycled steel whenever possible. Look for manufacturers committed to sustainable practices.
Safe Screw Storage and Disposal
-
Store leftover trim screws in a labeled container to prevent them from becoming lost or mixed with other hardware.
-
For disposal, check with your local recycling center to see if they accept metal scraps. If not, dispose of them responsibly in your general trash.
Trim screws are a versatile and essential fastener for various woodworking and carpentry projects. By understanding the different types, sizes, and installation techniques, you can ensure a professional-looking finish while considering environmental responsibility. With the right screws and a little practice, you’ll be well on your way to creating beautiful and long-lasting projects!
Adding Flair with Decorative Trim Screws
While the focus so far has been on functionality, trim screws can also add a decorative touch to your projects. Here are some ways to achieve this:
-
Exposed Screw Heads: In certain styles like rustic or industrial, intentionally leaving some screw heads exposed can add a unique design element. Choose screws with a decorative head style, like a square or hexagonal head, to enhance the look.
-
Contrasting Colors: For a bolder statement, play with contrasting screw colors. For example, use black screws against light-colored wood or vice versa. This can create a visually interesting detail.
-
Accenting with Washers: In some cases, adding small decorative washers around the screw head can provide an extra touch of detail. Choose washers made from brass or another metal that complements the screw material and overall project design.
Safety First: Precautions When Working with Trim Screws
Working with any tools and fasteners requires caution. Here are some safety tips to remember when using trim screws:
-
Wear Safety Glasses: Always wear safety glasses to protect your eyes from flying debris or sawdust that could be generated while drilling or driving screws.
-
Use the Right Tools: Ensure you’re using a screwdriver bit that matches the screw head type to avoid damaging the screw or the driver bit.
-
Mind Your Fingers: Keep your fingers clear of the screw head and path while driving the screw to prevent accidental nicks or injuries.
-
Store Screws Properly: Store leftover screws in a sturdy container with a lid to prevent them from becoming lost or mixing with other hardware.
By following these safety tips, you can ensure a smooth and enjoyable experience while working with trim screws on your next project.
Conclusion
Trim screws are a fundamental element in carpentry and woodworking, adding a polished look and strong hold to various projects. From understanding different types and sizes to applying installation techniques, this guide has equipped you with the knowledge to confidently use trim screws and achieve professional-looking results. Remember, with a little planning and the right tools, you can create beautiful and long-lasting projects that showcase your skills!