Different Types of Headphones Compatible with PS4
Choosing the right headphones for your PS4 can enhance your gaming and entertainment experience. Here are the main types of headphones that you can connect to your PS4:
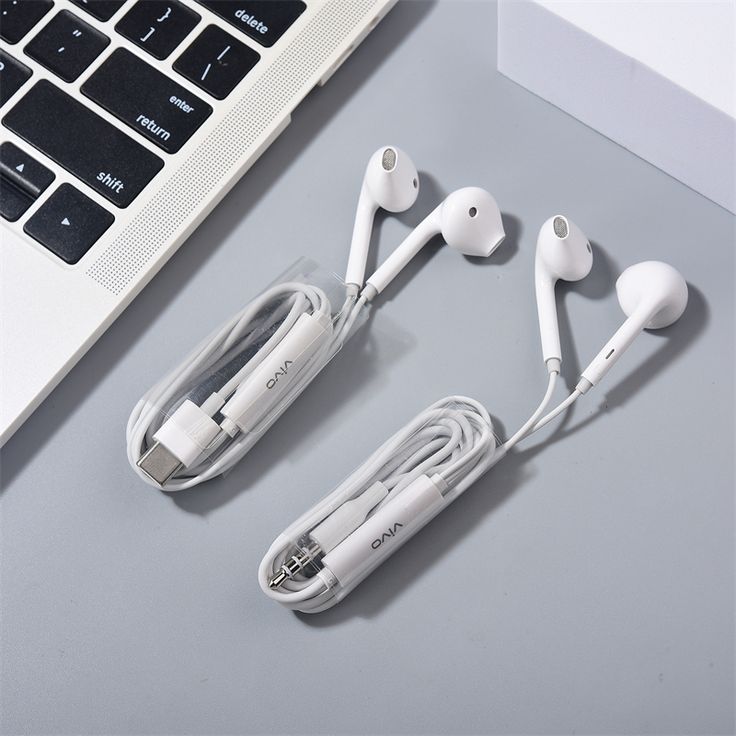
- Standard Wired Headphones: These use a 3.5mm jack and plug directly into your PS4 controller. They are simple to connect and don’t require a battery.
- Wireless Bluetooth Headphones: Designed for convenience, these headphones connect to your PS4 via Bluetooth. Some may require a compatible USB adapter.
- Gaming Headsets: Specifically made for gamers, these headsets often come with features like built-in microphones and enhanced audio drivers.
- USB Headphones: Using a USB port on your PS4, these headphones are easy to set up and may offer better sound quality and additional features compared to 3.5mm options.
When choosing headphones for your PS4, consider comfort, sound quality, and whether you want a wireless or wired experience. Each type has its own setup process, which we will cover in the following sections. Remember to consider how to connect headphones to PS4 as you read through each option.
Preparing to Connect Your Headphones
Before you can enjoy immersive audio with your PS4, ensure your headphones are ready for connection. This step is vital, as it prevents any unnecessary interruptions during gameplay or while enjoying other media.
Checking Your Headphone’s Compatibility
Before proceeding, check if your headphones are compatible with the PS4. Here’s how to do it:
- Consult the Headphone Manual: Look for information about compatibility with gaming consoles or specifically the PS4.
- Research Online: Search for your headphone model and its compatibility with PS4 online.
- Check for Necessary Adapters: Some wireless models may require a USB adapter that’s compatible with the PS4.
If your headphones are not directly compatible, you may need additional equipment to connect them to your PS4.
Identifying Your PS4 Model
Different PS4 models might have slightly different connection methods. To identify your model:
- Look at the Packaging: Your PS4’s box will typically indicate the model.
- Check the System Information: Go to your PS4 settings and find ‘System Information’ to see your model number.
- Examine the Console: Look for any model identifiers on the console itself, usually found on the bottom or back.
Knowing your PS4 model will help you follow the correct steps on how to connect headphones to your PS4 without issues.

Connecting Wired Headphones to the PS4 Controller
After ensuring your headphones are compatible and you have identified your PS4 model, it’s time to connect your wired headphones. If you’re using standard wired headphones with a 3.5mm jack, here is what you need to do:
- Locate the headphone jack on your PS4 controller, which is on the bottom of the controller near the front.
- Insert the headphone plug into the jack until you feel it click into place.
- Turn on your PS4 and the controller, and make sure they are paired.
- Test the headphones by playing a game or accessing any media to check if the sound comes through.
It’s that simple! Wired headphones offer a straightforward connection with minimal setup required. Now that your headphones are connected, the next step is to adjust the settings to ensure you get the best audio experience.
Adjusting the Settings for Wired Headphones
To adjust the audio settings on your PS4 for wired headphones, follow these steps:
- Go to your PS4 home screen and navigate to ‘Settings’.
- Select ‘Devices’ > ‘Audio Devices’.
- Under ‘Output to Headphones’, choose ‘All Audio’ for full audio or ‘Chat Audio’ to only hear chat sounds.
- Adjust the ‘Volume Control (Headphones)’ to set the sound level to your preference.
By adjusting the audio output settings, you can control how sound is delivered to your headphones and optimize your listening experience. Remember, for certain games and applications, you may also adjust the audio mix between game sound and chat audio directly within the game or chat settings.
Pairing Wireless Headphones with Your PS4
If you value freedom from wires, pairing wireless headphones with your PS4 can be a game-changer. Here’s how to use your PS4’s Bluetooth to connect:
Using the PS4’s Built-In Bluetooth Functionality
- Power on your PS4 and navigate to the Settings menu.
- Select ‘Devices’, then choose ‘Bluetooth Devices’.
- Put your wireless headphones into pairing mode. Check their manual for instructions.
- Your PS4 will search for Bluetooth devices. Select your headphones when they appear on the screen.
- Follow any additional prompts to complete the pairing.
If your headphones connect, test the sound by playing a game or other media. Not all Bluetooth headphones will be directly compatible, though. In that case, you may need a different approach.
Using a Compatible USB Adapter for Non-supported Bluetooth Headphones
For headphones that don’t support the PS4’s Bluetooth, use a USB adapter:
- Plug the USB adapter into your PS4’s USB port.
- Turn on your headphones and put them into pairing mode.
- Your PS4 should recognize the adapter as an audio device. Follow on-screen instructions.
- Adjust your audio settings as needed under ‘Devices’ > ‘Audio Devices’.
Remember, some wireless headphones might require a specific brand or model of USB adapter to connect to a PS4. Double-check your headphone’s specifications for the right type. This ensures a smooth connection process and optimal audio performance. When finished, you’re ready to enjoy your wireless headphones with your PS4.

Troubleshooting Common Connection Issues
Even with the right setup, sometimes headphones may not work as expected with your PS4. Common issues include audio output problems and challenges with wireless headphone connectivity. Let’s dive into how to address these to ensure a smooth gaming and audio experience.
Audio Output Problems
If you encounter issues where no sound plays through your headphones, here are steps to fix the problem:
- Check the headphone plug to ensure it’s firmly connected to the controller.
- Verify the PS4 system isn’t muted and that the volume is up.
- Inspect your headphones on another device to rule out a headphone malfunction.
- For wireless headphones, ensure they have enough charge and are within range.
- Restart the PS4 and reconnect your headphones.
After these steps, if the issue persists, delve into the PS4 settings as shown in the ‘Adjusting the Settings for Wired Headphones’ section. This can often resolve audio output problems.
Connectivity Challenges with Wireless Headphones
Wireless headphones can sometimes face connection issues due to interference or compatibility. Here’s how to tackle these challenges.
- Make sure your wireless headphones are in pairing mode correctly as per the manual.
- Keep other Bluetooth devices away to reduce interference during pairing.
- Confirm your headphones are compatible with PS4, or use a supported USB adapter.
- Reset your headphones and the PS4’s Bluetooth settings, then attempt to re-pair.
- Check for PS4 system updates, as they can sometimes improve device compatibility.
By following these troubleshooting steps, you enhance your chances of resolving wireless headphone connectivity issues effectively. With the headphones connected and working correctly, you’re ready to adjust the audio levels to suit your needs.
Adjusting Audio Levels and Settings on the PS4
Once you’ve managed to connect your headphones to the PS4, you may need to fine-tune the audio settings to match your preferences. Here is a quick guide on how to adjust audio levels and settings on your PS4 for the perfect balance between game sounds and chat audio.
- Start your PS4 and log in to your profile.
- Press ‘up’ on the D-pad to access the main menu, then navigate to ‘Settings’ and select it.
- Scroll to ‘Devices’ and select ‘Audio Devices’.
- You should see two settings: ‘Input Device’ and ‘Output Device’. Ensure your headphones are selected for both.
- To adjust the volume, select ‘Volume Control (Headphones)’ and use the left or right buttons on the D-pad to increase or decrease the level.
- If you want all audio to go through your headphones, not just chat, select ‘Output to Headphones’ and change it to ‘All Audio’.
- Some gamers prefer to also adjust the ‘Sidetone Volume’. This controls how much of your own voice is fed back to you. Adjust this if necessary.
- For the best possible sound experience, consider enabling ‘Sound and Screen’ from the main menu and selecting ‘Audio Output Settings’. This allows you to configure specific settings like the audio format.
By following these steps, you’ll have precise control over how audio is fed through your headphones, ensuring you catch every detail of your gaming experience. Remember to keep the volume at a safe level to prevent hearing damage.

Additional Tips for Enhancing the Audio Experience
Getting the best audio from your PS4 isn’t just about connecting headphones. Use these extra tips to enhance your audio experience.
Using the PS4 Companion App
The PS4 Companion App is a powerful tool for audio management. Here’s how it can help:
- Download the app on your smartphone.
- Connect your phone to the same network as your PS4.
- Use the app to control your PS4, and manage audio settings on the go.
The app lets you make quick changes without pausing the game. Adjust the volume, change settings, and more from your phone.
Recommended Accessories for Optimal Audio Performance
To truly elevate your sound, consider these accessories:
- High-Quality Headphones: Invest in headphones with good sound quality and comfort.
- Dedicated Microphone: For clear voice chat, get a separate mic.
- Headphone Amplifiers: Boost audio quality and volume with an amp.
- Extended Battery Packs: For wireless headphones, these can increase playtime.
Choosing the right accessories can turn good sound into a great one. Research to find the ones that work best for how you use your PS4.

