Why Choose a Wall Mount for Your Soundbar
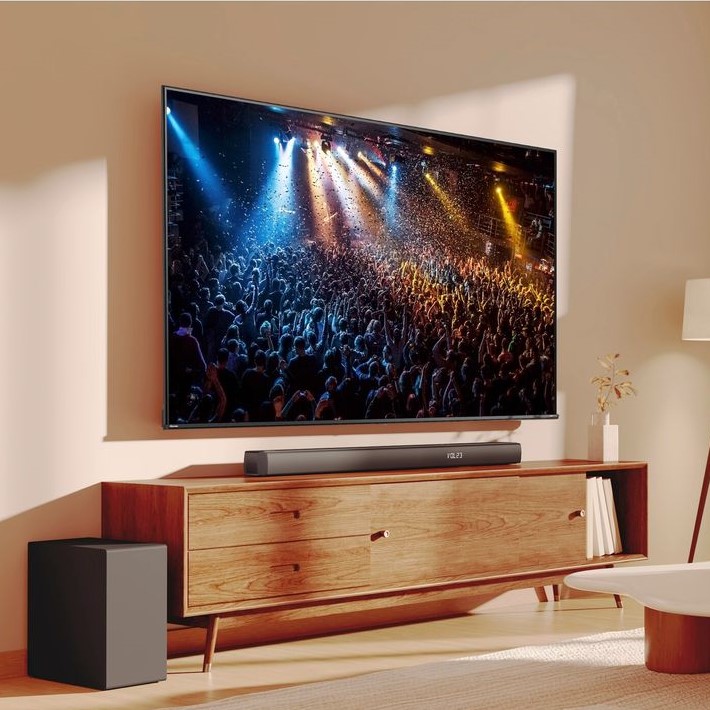
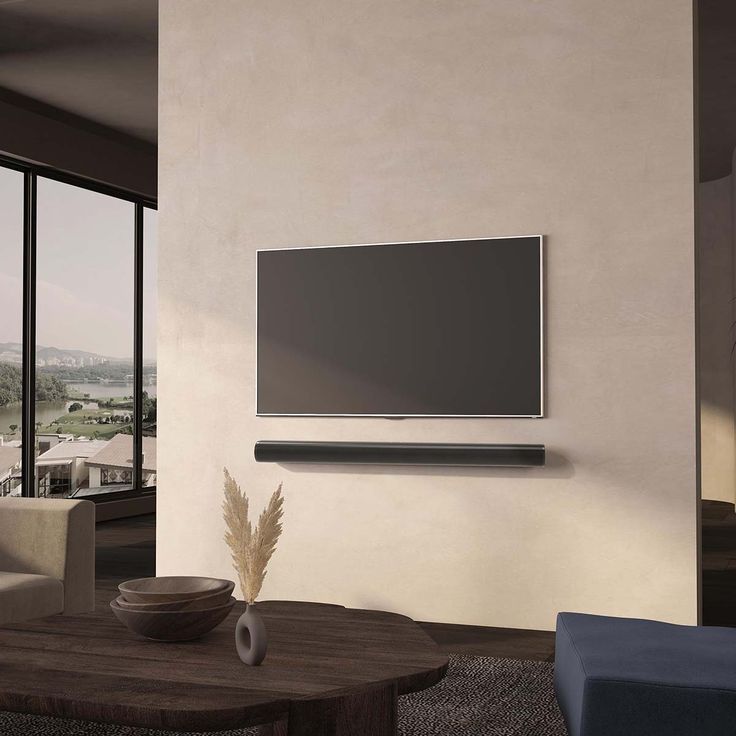
Mounting your soundbar on the wall offers various advantages. It improves audio performance and enhances the look of your room. Let’s explore the benefits and optimal placement tips for a soundbar wall mount.
Benefits of Wall Mounting a Soundbar
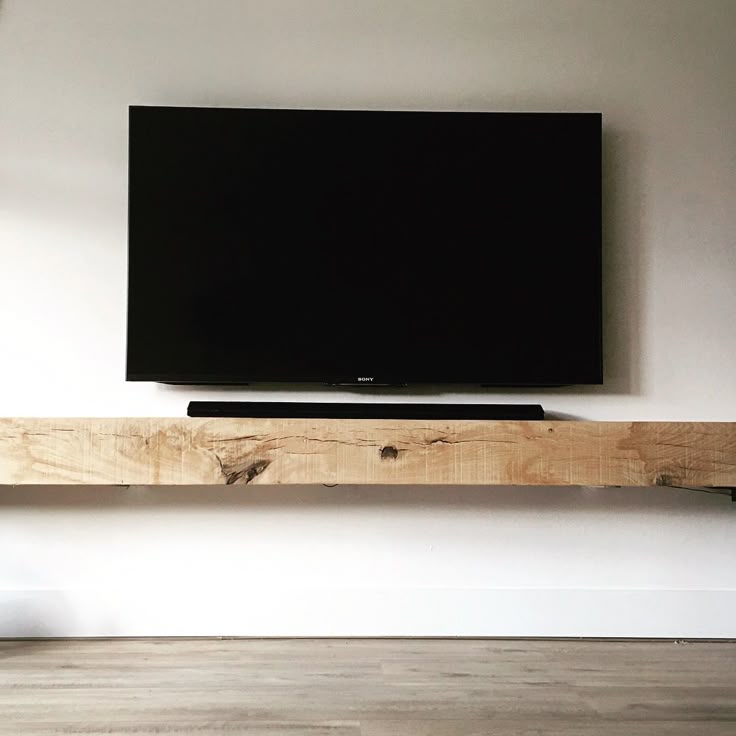
- Space-Saving Solution: Wall mounting frees up space on your TV stand or furniture.
- Better Surround Sound: It positions the soundbar to deliver clear and immersive audio.
- Reduced Clutter: Elevating the soundbar keeps wires neatly organized.
- Enhanced Aesthetics: A mounted soundbar creates a sleek, modern look for your home.
- Improved Durability: Keeping it off surfaces protects it from accidental spills or damages.
Ideal Placement for Optimal Sound Quality
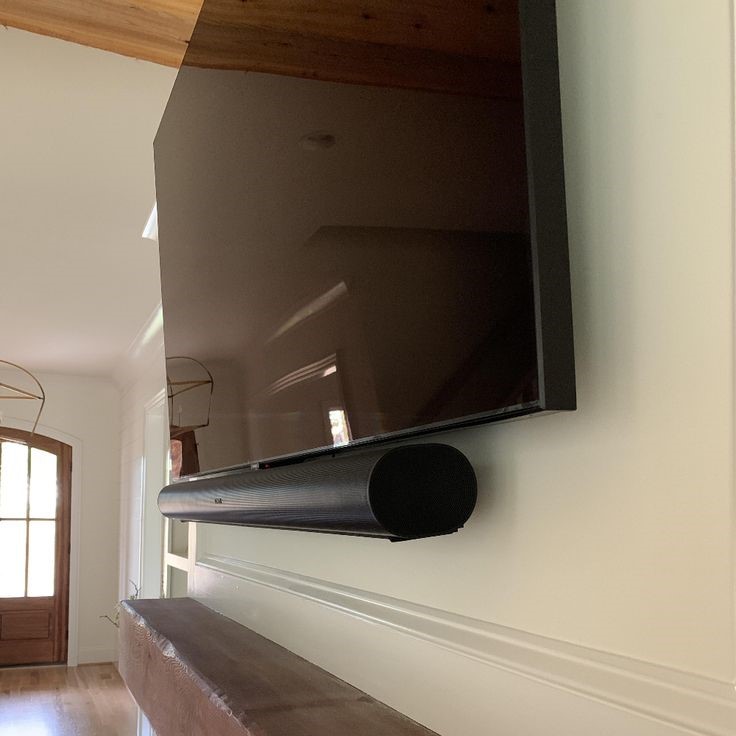
- Center Alignment: Position the soundbar directly below or above the TV for balanced audio.
- Proper Height: Place it at ear level when seated to enhance clarity.
- Avoid Obstructions: Ensure the soundbar has a clear, open space in front to prevent sound distortion.
- Wall Type Consideration: Mount on solid walls like drywall or concrete for a sturdy setup.
- Distance from TV: Keep it close to the TV to sync audio and visuals effectively.
Selecting a wall mount for your soundbar is a practical choice. Make sure it’s placed correctly to maximize its performance.
Tools and Materials Needed for Installation
Before installing your soundbar wall mount, gather all necessary tools and materials. Having everything ready ensures a smooth process.
Essential Tools for the Job
Measuring Tape
Ensures Precise Alignment: A measuring tape is essential for accurately measuring distances from the floor to the desired height of the soundbar. Proper measurements help to achieve the ideal viewing angle.
Correct Placement of the Mount: By taking multiple measurements, you can ensure that the mount is positioned exactly where you want it, preventing any misalignment that could affect functionality.
Pencil or Marker
Mark Mounting Points: Once you have measured the proper height and alignment, use a pencil or marker to mark the specific points on the wall where the mount will attach. This step is crucial for accuracy.
Ensure Clarity: Using a visible marking tool ensures that your markings are easily seen during the installation process, helping you to avoid errors.
Level
Keeps the Mount Straight: A level is indispensable when installing any wall-mounted device. It helps to ensure that the mount is perfectly horizontal, preventing crooked installations.
Enhances Professional Appearance: Using a level not only ensures functionality but also enhances the visual appeal, as a straight mount contributes to a more polished look.
Drill and Appropriate Drill Bits
Drills Holes into the Wall: A drill is necessary for creating holes in the wall for secure mounting. Make sure to select the appropriate drill bit size for your specific mounting hardware.
Facilitates Easy Installation: Having a power drill expedites the process, making it quicker and easier to prepare the wall for installation.
Screwdriver
Tightens Screws in Place: A screwdriver is required to secure the screws that hold the mount and soundbar in place. Having the right type of screwdriver (flat head or Phillips) is essential for proper fit and function.
Ensures a Sturdy Mounting: Tightening the screws thoroughly is vital for ensuring that the soundbar mount is secure and can hold the weight of the soundbar without any risk of falling.
Stud Finder
Helps Locate Wall Studs: A stud finder is an important tool for identifying the location of wall studs. Mounting your soundbar to a stud significantly increases the sturdiness and durability of the installation.
Prevents Damage to Walls: By finding studs, you avoid drilling into unsupported areas of the wall, which can lead to damage or inadequate support.
Allen Wrench
Commonly Needed for Soundbar Mount Screws: Depending on the specific mount design, an Allen wrench may be required to tighten or loosen screws. Many soundbar mounts use hex screws that necessitate an Allen wrench for adjustments.
Ensures Flexibility in Installation: Including an Allen wrench in your toolkit allows you to make quick adjustments during installation, ensuring a secure fit for your soundbar.
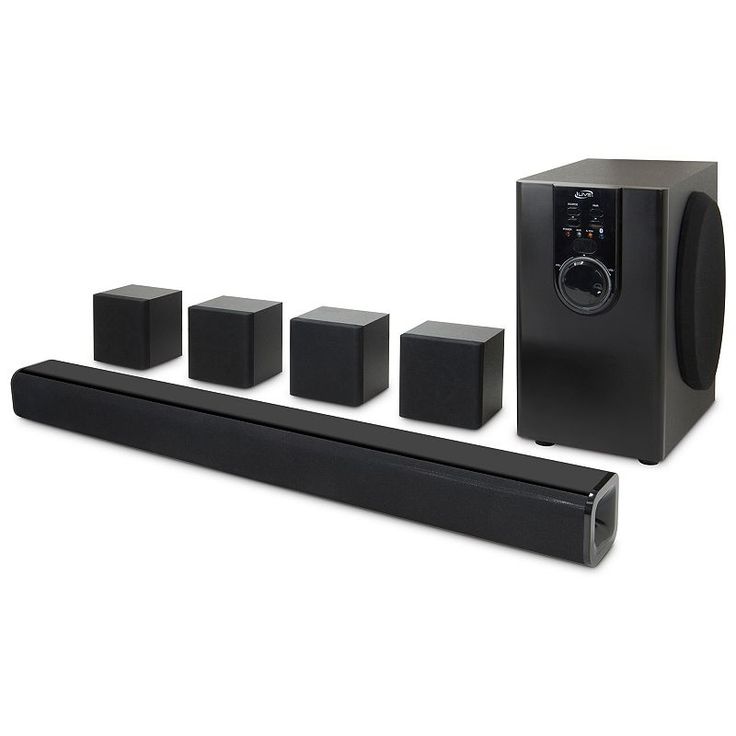
Recommended Wall Mount Kits for Soundbars
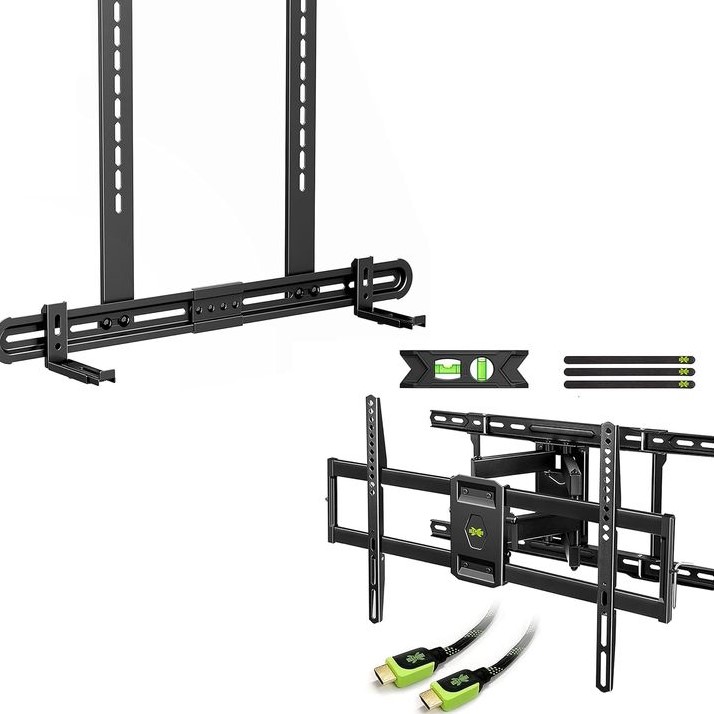
- Universal Soundbar Wall Mount Kit: Compatible with most soundbar models.
- Adjustable Brackets: Allow for flexible positioning and better sound adjustment.
- Heavy-Duty Mounts: Ideal for larger or heavier soundbars.
- Cable Management Mounts: Include features to keep wires hidden.
Ensure the tools and wall mount kit match your soundbar model and wall type. Proper preparation is key to a successful installation.
Preparing for Installation
Before installing your soundbar wall mount, preparation is crucial. A few thoughtful steps ensure a smooth process and effective setup.
Choosing the Right Location on the Wall
- Find a Central Spot: Select a wall area directly below or above the TV for balanced sound.
- Assess Viewing Angle: Ensure the soundbar aligns with your seating arrangement for an optimal experience.
- Measure Wall Space: Check if the area can accommodate both the mount and the soundbar comfortably.
- Consider Power Outlets: Choose a spot near electrical outlets to avoid messy cable extensions.
- Avoid Interference: Keep it away from windows or other reflective surfaces that might distort sound quality.
Ensuring Compatibility with Your Soundbar Model
- Check Dimensions: Verify the soundbar fits within the mount’s adjustable brackets or specifications.
- Confirm Weight Support: Ensure the mount can hold the soundbar’s weight safely.
- Inspect Mounting Holes: Review the soundbar’s design to ensure it has proper mounting points.
- Refer to Manufacturer Guidelines: Consult the manual for any specific installation requirements.
- Test Adjustability: If using an adjustable mount, confirm it suits the soundbar’s positioning needs.
Careful planning simplifies installation and guarantees a secure setup for your soundbar wall mount.
Step-by-Step Guide to Installing a Soundbar Wall Mount
Follow these steps for a smooth and secure installation of your soundbar wall mount.
Marking and Measuring the Mounting Points
- Use a Measuring Tape: Measure and find the center point for soundbar placement.
- Check Alignment: Ensure the location matches your TV’s center for optimal sound balance.
- Mark Spots: Use a pencil or marker to mark where screws or brackets will go.
- Verify with Level: Ensure all marks are horizontally straight, avoiding uneven mounting.
- Locate Wall Studs: Use a stud finder for added support and stability.
Correctly Drilling Holes in the Wall
- Select Drill Bits: Use drill bits suitable for your wall type (drywall, brick, etc.).
- Test Marks: Double-check the accuracy of your marked points before drilling.
- Drill Holes: Carefully drill holes at each marked point. Keep the drill steady.
- Clean Debris: Remove dust or debris created by the drilling process.
- Avoid Electric Wires: Ensure no wires or cables are hidden behind the drilling spots.
Attaching the Wall Mount Bracket
- Position Bracket Properly: Line up the bracket with the drilled holes.
- Secure Screws: Use a screwdriver or drill to firmly tighten screws into the wall.
- Check Stability: Ensure the bracket is tightly mounted, preventing any potential wobbling.
- Inspect Alignment: Confirm the mount aligns with the TV and seating arrangement.
Securing the Soundbar to the Mount
- Attach Brackets to Soundbar: Fit soundbar brackets as per the mount kit instructions.
- Lift and Lock: Lift the soundbar and attach it securely to the mounted bracket.
- Tighten All Screws: Use an Allen wrench or screwdriver to ensure brackets are secure.
- Test for Firmness: Gently push the soundbar to check its stability.
- Adjust Position: If using adjustable brackets, tweak positioning for better audio delivery.
Following these steps ensures your soundbar wall mount is installed securely and efficiently.
Cable Management Tips for a Clean Setup
Proper cable management enhances both the aesthetics and organization of your soundbar wall mount setup.
Hiding Wires Behind the Wall
- Plan Cable Routing: Decide the path for wires behind the wall before starting the process.
- Use a Wall Plate: Install wall plates specifically designed for cables. They ensure clean access points.
- Drill Small Holes: Drill holes in the wall for placing cables. Ensure they’re hidden yet accessible.
- Fish Tape Tool: Use a fish tape tool to guide cables through the wall efficiently.
- Secure Connections: Ensure cables are tightly connected to avoid loose or unstable wiring.
- Inspect for Safety: Double-check there are no electrical hazards or issues with hidden wires.
Using Cable Concealers for Better Aesthetics
- Select Concealer Kits: Choose concealer kits that match your wall’s color and texture.
- Measure Cable Length: Measure the total cable length to ensure the concealers fit properly.
- Apply Adhesive Strips: Stick the concealers along the wall using provided adhesive strips or screws.
- Route Cables Through Tracks: Place cables inside concealer tracks to keep them organized and out of sight.
- Keep Cables Neat: Avoid overcrowding concealers. Ensure cables run smoothly without tangles.
- Inspect Placement: Once installed, check the concealers’ alignment for a seamless look.
Effective cable management creates a clutter-free and visually pleasing soundbar wall mount setup.
Common Mistakes to Avoid During Installation
Soundbar wall mount installation can go wrong without proper attention to detail. Prevent issues by avoiding common mistakes.
Inaccurate Measurements and Placement
- Skipping Measurements: Failing to measure accurately leads to misaligned mounting points.
- Not Using a Level: Without a level, the soundbar may sit crooked.
- Poor TV Alignment: Misaligned placement creates uneven sound distribution.
- Ignoring Wall Studs: Missing wall studs reduces the mount’s stability.
- Incorrect Height: Placing the soundbar too high or low impacts sound quality.
Double-check all measurements to ensure precise soundbar positioning. Proper alignment improves both sound and aesthetics.
Using Incorrect Mounting Hardware
- Wrong Screw Types: Using weak or inappropriate screws can make the mount unstable.
- Skimping on Anchors: Anchors are essential for drywall installations without studs.
- Mismatched Mount Kits: Ensure the kit fits your soundbar’s model and weight.
- Over-Tightening Screws: Overtightened screws may damage the wall or mount.
- Ignoring Manufacturer Guidelines: Failing to follow directions could void warranties or cause errors.
Always use sturdy hardware compatible with both the wall type and soundbar. Following these tips prevents installation failures.
Maintenance and Safety Tips
After installing your soundbar wall mount, proper maintenance ensures its long-term stability and functionality. Follow these tips to keep your setup in top shape.
Checking the Stability of the Mount Over Time
- Inspect Screws Regularly: Check screws for looseness and tighten them if necessary.
- Test Mount Strength: Gently push the soundbar to ensure the mount holds firmly.
- Monitor Wall Condition: Look for cracks or signs of wear around the mounting points.
- Check Bracket Alignment: Ensure the brackets remain properly aligned with the soundbar.
- Use a Level for Verification: Periodically confirm that the mount hasn’t shifted.
- Address Vibrations Early: Fix any rattling or noise, which can signal loose components.
Keeping the mount secure prevents accidents and ensures optimal sound quality.
Cleaning and Protecting the Soundbar and Mount
- Dust the Soundbar Regularly: Use a soft cloth to remove dust and dirt.
- Avoid Harsh Chemicals: Clean with a mild solution to protect the soundbar’s finish.
- Check Cables for Wear: Inspect cables for fraying and replace them if damaged.
- Protect from Spills: Keep liquids away from the soundbar to avoid electrical damage.
- Ensure Proper Ventilation: Keep the area around the soundbar open to prevent overheating.
- Wipe the Mount: Clean the bracket and wall area to maintain a tidy setup.
Regular care keeps your soundbar and wall mount looking new and performing well.
Conclusion
In conclusion, a soundbar wall mount is a smart and practical choice for anyone looking to improve their home audio setup. It enhances sound quality, saves space, and creates a cleaner, more modern look. Whether you’re a casual listener or a serious audiophile, installing a soundbar wall mount can make a noticeable difference in your listening experience.
By following the steps outlined in this guide, you can confidently install your soundbar wall mount without the need for professional help. From choosing the right mount to avoiding common mistakes, every detail contributes to a successful outcome. Remember to prioritize safety, accuracy, and compatibility throughout the process.
If you’re still unsure or encounter any issues, don’t hesitate to seek additional resources or ask for help. With the right tools and knowledge, you can enjoy the full benefits of a soundbar wall mount. So why wait? Start your installation today and unlock the full potential of your soundbar. Why do runners wear arm sleeves? Because they matter. And why do people choose a soundbar wall mount? Because it makes a difference.